A surprising shift happened when Apple added height measurement to iPhones: instead of guessing with a ruler on a wall, you can now frame a person in your camera view and let AR do the math—often in seconds.
The key detail is that Apple’s Measure app treats your iPhone like a tape measure, using AR (Augmented Reality) for spatial tracking and, on supported iPhone Pro models, LiDAR to improve depth sensing. That combination is what enables “floor to top of head” style measurements—down to hair or a hat—without you placing anything physical in the scene.
What the Measure app actually measures (and why framing matters)
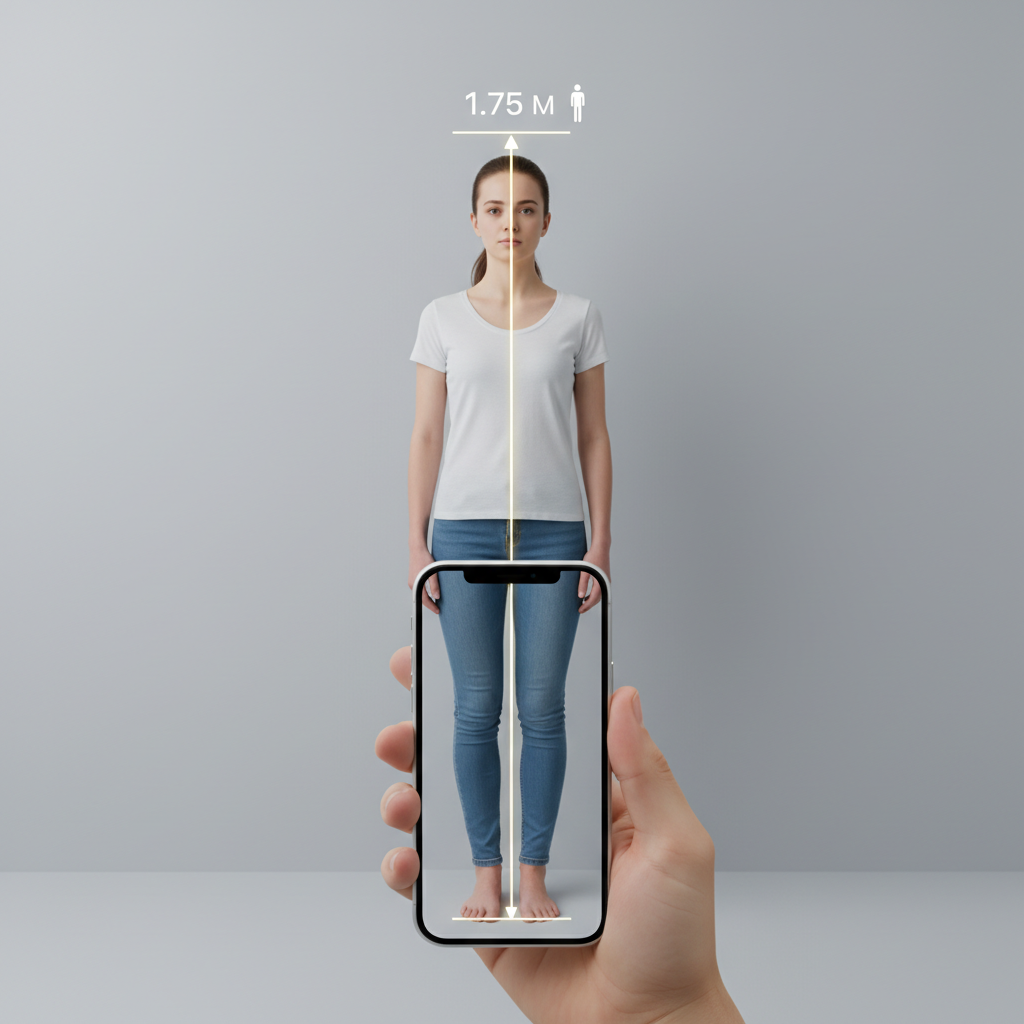
Apple’s Measure app measures height when a person appears in the viewfinder and a height line/number becomes available. In practice, you’re not just recording a visual estimate; the app is calculating distance in 3D relative to the floor plane it establishes through AR tracking.
The difference between an accurate reading and a misleading one usually comes down to framing. For best results, you want the person positioned head-to-toe in the camera view—standing upright, facing the camera (or at least not dramatically tilted), and staying still long enough for the height line/number to appear. Because the app can measure the top of the head, including hair or a hat, small posture changes near the top (chin up/down, hat brim angle) can shift the measurement.
That’s also why “floor to top of head” can vary from traditional methods. A wall ruler assumes a fixed reference plane; the Measure app uses AR to interpret the floor. If the floor is uneven or the phone is not aligned well with the space, the estimated floor plane can move slightly—showing up as a small error in centimeters.
Step-by-step: measure height on iPhone using AR (and LiDAR when available)
Start by opening Apple’s Measure app. When it launches, you’ll see a view that’s designed for AR measurement. Next, frame the person so the camera can capture them from the floor up to the top of the head (hair/hat included).
Keep the iPhone stable while you align the shot. Once the app detects the person in view, the height line and a number should appear. At that moment, you’re ready to “lock in” the result—Apple’s workflow supports taking a picture to preserve the measurement context (useful when you’re comparing multiple attempts or measuring more than one person).
On supported Pro models that include a LiDAR sensor, the app can use that depth capability to improve how precisely it reads distance. In real-world terms, this often helps in harder environments—rooms with mixed lighting, tighter spaces, or scenes where AR tracking might otherwise struggle to stabilize the depth map quickly.
How to improve accuracy: lighting, distance, and “no surprises” positioning
AR measurement isn’t magic; it’s sensor-driven math. If you’ve ever seen a camera app “hunt” for focus or stability, you’ve seen the same underlying challenge: without reliable spatial tracking, height estimates become less consistent.
Use clear, even lighting so the iPhone can separate the subject from the background. Avoid strong backlighting where the person’s silhouette becomes too dark relative to the room. Also keep the subject at a reasonable distance: if they’re too close, the phone’s perspective can distort how the floor and top of the head are captured; too far, and the subject can become too small in the viewfinder for stable height detection.
Finally, be deliberate about alignment. A slight camera tilt upward can make “top of head” detection more error-prone, especially if the person isn’t fully upright. A practical approach is to move your feet (or reposition the phone) rather than trying to measure while holding the camera at a steep angle.
Troubleshooting and best practices: repeatable results in everyday scenarios
If the height number doesn’t appear quickly, don’t just wait indefinitely—adjust the setup. Reframe so the person is fully visible from head to floor, reduce distractions in the background, and give the iPhone a second or two of stability before trying again. The Measure app’s height feature relies on finding a consistent spatial relationship between the subject and the floor plane.
For consistency, take more than one reading and compare. For example, measure once, then step the iPhone slightly to the left or right (not drastically forward/back) and measure again. If two attempts land close—say within a small margin—you’ve likely got a reliable floor plane and top-of-head detection. If they diverge noticeably, the room geometry or posture alignment is the likely culprit.
And when you save results, take advantage of the “take picture” behavior. A photo of the measuring moment provides context that helps you verify whether the top edge corresponded to hair/hat or whether the person’s stance changed between attempts.
Bottom line: the fastest path to a trustworthy iPhone height measurement
To measure height with an iPhone, open the Measure app, frame the person head-to-toe, and wait for the height line/number to appear. On iPhone Pro models with LiDAR, depth sensing can make the measurement more dependable in complex real-world conditions.
For best accuracy, prioritize steady framing, even lighting, and an upright subject. Take a second shot for verification if your first reading feels off. With that workflow, your iPhone becomes a quick, repeatable measurement tool—without the clutter of rulers or marking walls.