Although Apple has added a long-press power button to the iPhone to call the “SOS emergency service” function, in the event of an emergency, many people will be so nervous that they are in a hurry, and having to swipe to call the emergency service unit is a bit too troublesome.
This time I will share another more practical iPhone emergency SOS shortcut script. If a person is suddenly threatened or kidnapped by a gangster while walking alone, he can immediately send a rescue message to the emergency contact by quickly tapping the back of the iPhone three times. .
iPhone emergency SOS shortcut script download and usage tips
1. iPhone SOS emergency shortcut download
Through the iPhone’s built-in Safari browser and clicking the “Add Shortcut” button, the shortcut script can be downloaded and added to the shortcut library. If the “Shortcut App” is not installed on the iPhone, you must first download it separately through the App Store (Click here to download Shortcut App).
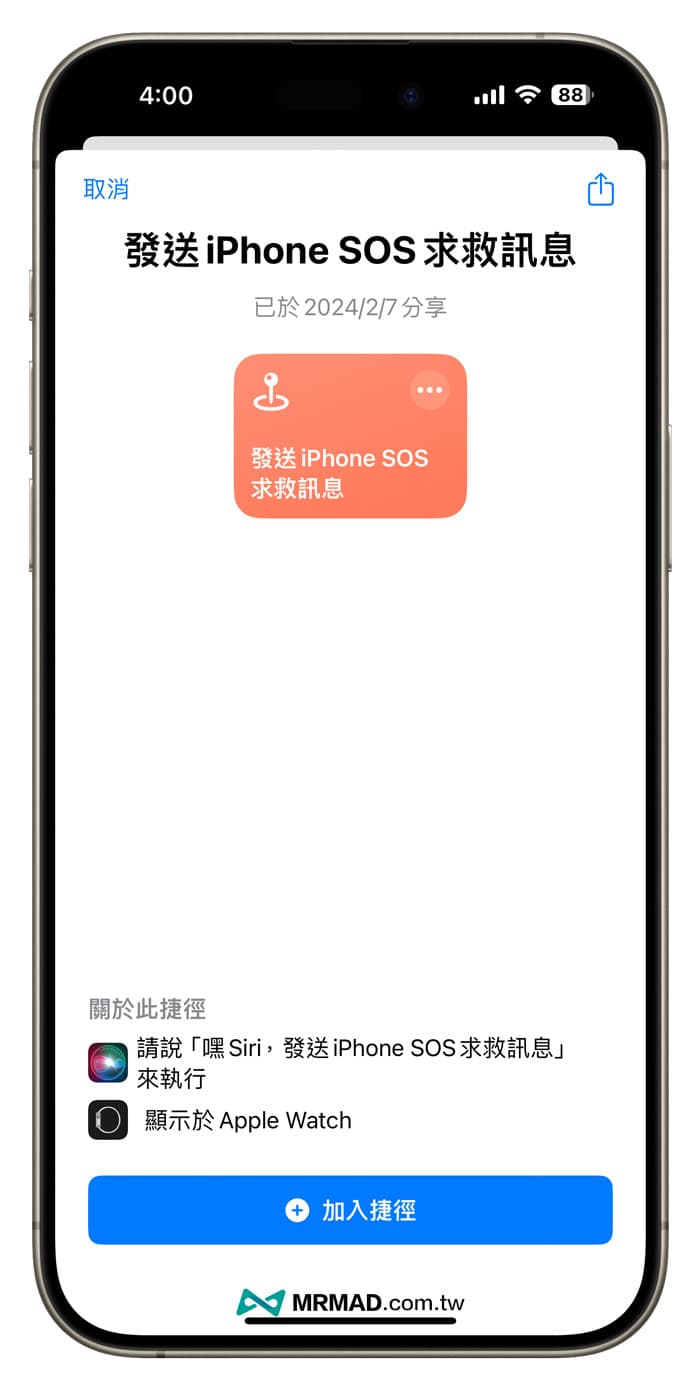
⛔️ If the “This shortcut cannot be opened because your shortcut security settings do not allow untrusted shortcuts” situation appears when downloading the iOS shortcut script, you can solve it through “Another method (click me)”; if the shortcut is open The download page pops up with “Unable to connect to the shortcut database”. Click the refresh button below and it will display normally.
Shortcut script download👉:iPhone emergency help shortcut script
2. Set up emergency contacts
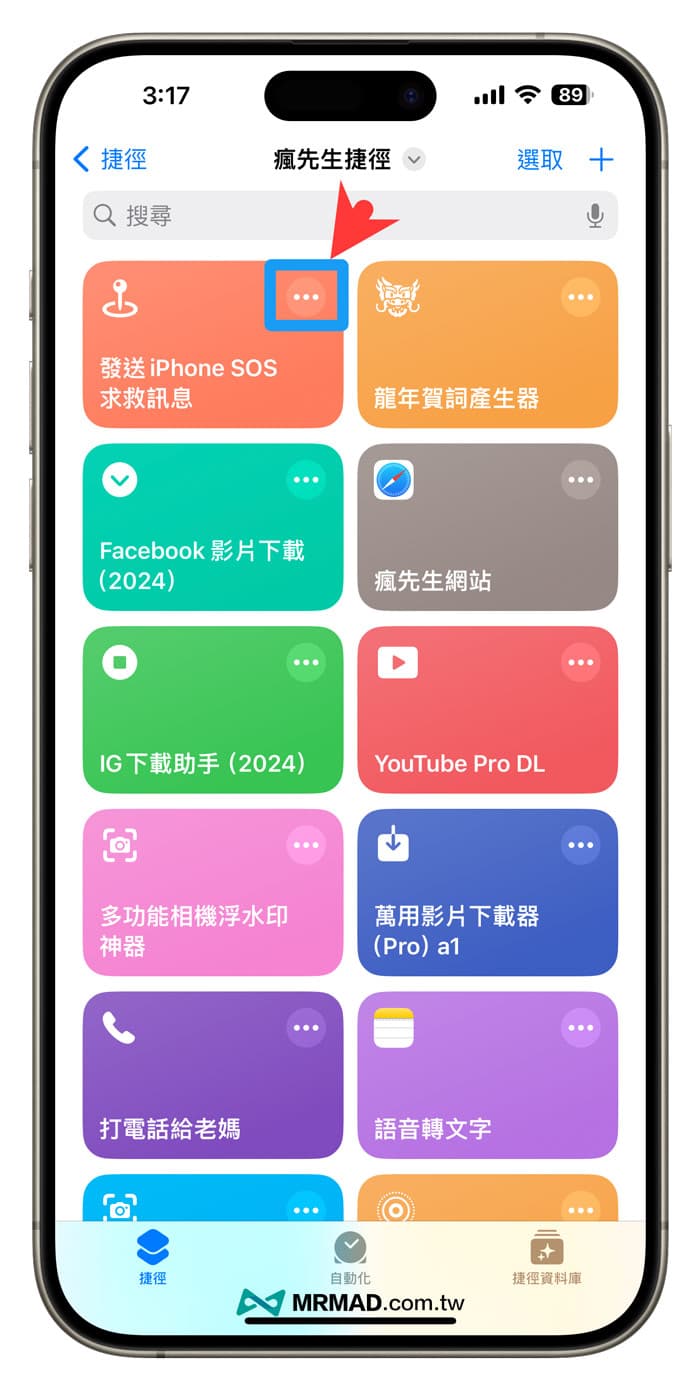
Open the Shortcut App and you will see the “Send iPhone SOS distress message” shortcut script on the main screen. Click “•••” in the upper right corner to edit the script.
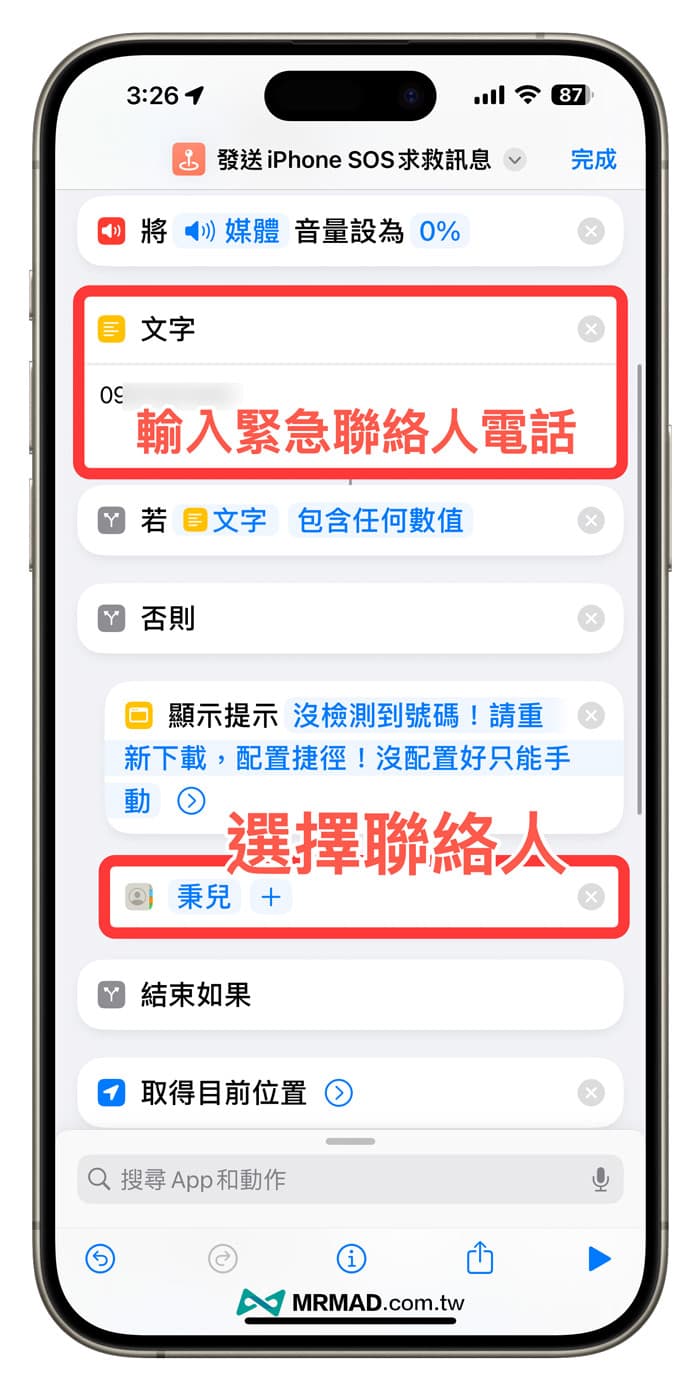
First enter the emergency contact phone number in the text input box. You can receive it regardless of whether the other party has an iPhone. The contact person can also select the contact name from the address book.
Finally, slide down to customize the content of the distress message sent. You can modify the settings according to your own preferences to let the other party know that we are in danger and need to call for help. After everything is set, you can click “Done” in the upper right corner.
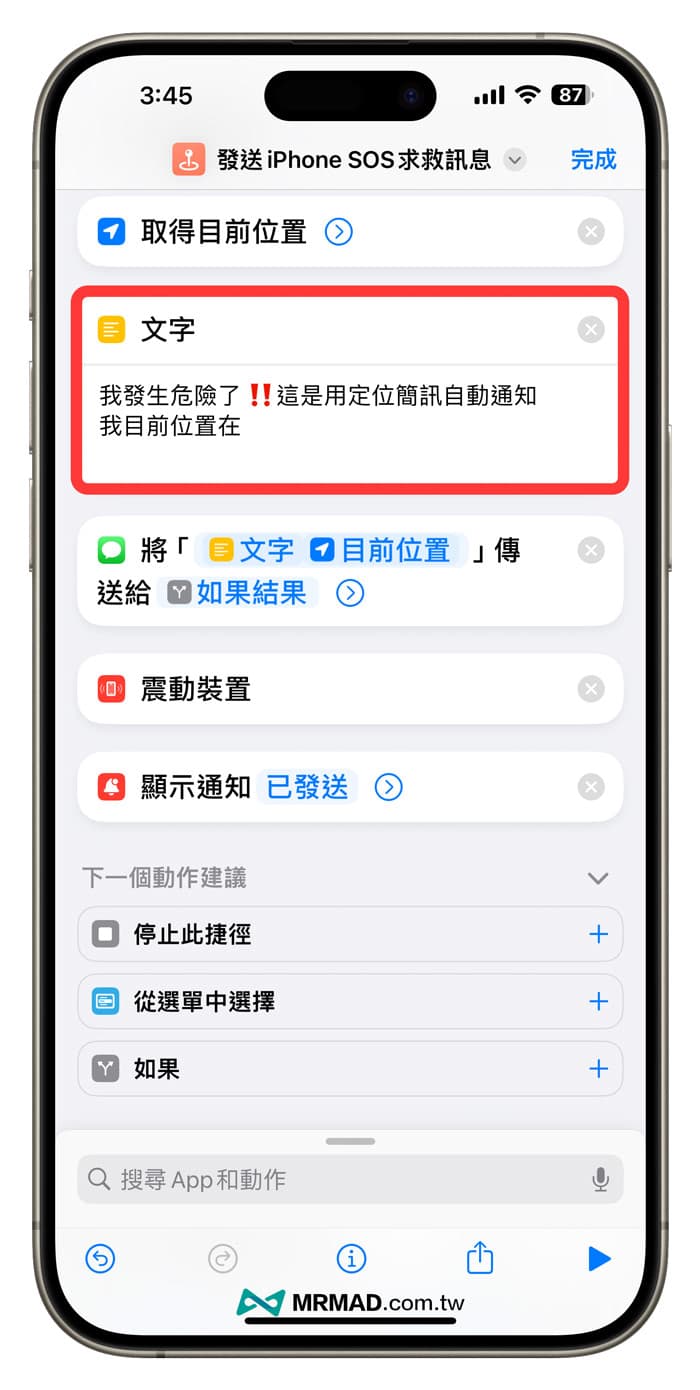
3. Set up tapping the back of iPhone to send a distress message
The last step is to set up the SOS distress message to be automatically sent by clicking on the back of the iPhone. You can set it up through the following steps:
- Open the iOS built-in “Settings” App.
- Select “Assisted Use”.
- Slide to the bottom and click “Back Tap”.
- Change the three clicks to “Send iPhone SOS”.
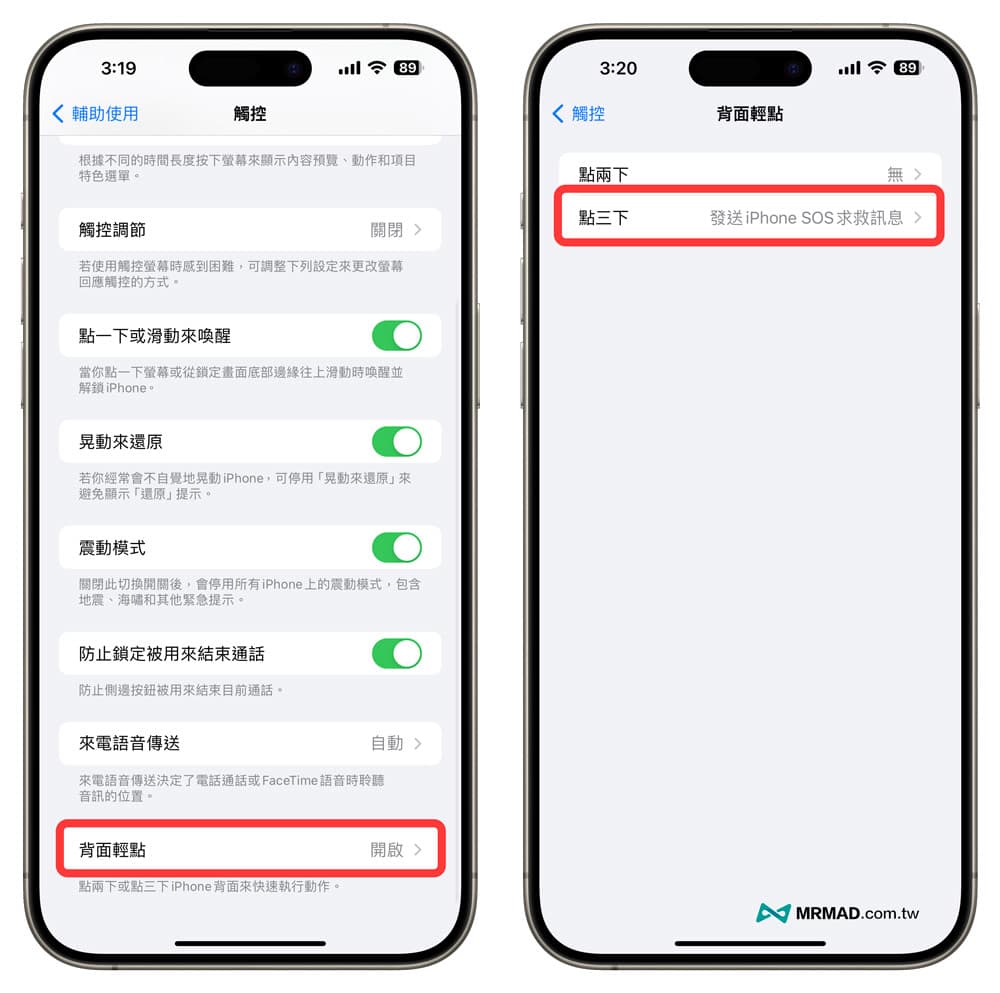
4. Click on the back of the phone to quickly send SOS messages
After all the previous settings are completed, you can tap the back of your iPhone three times to automatically send an emergency message to your contact. In actual testing, your current location will be sent directly to let the other person know that you are in danger.
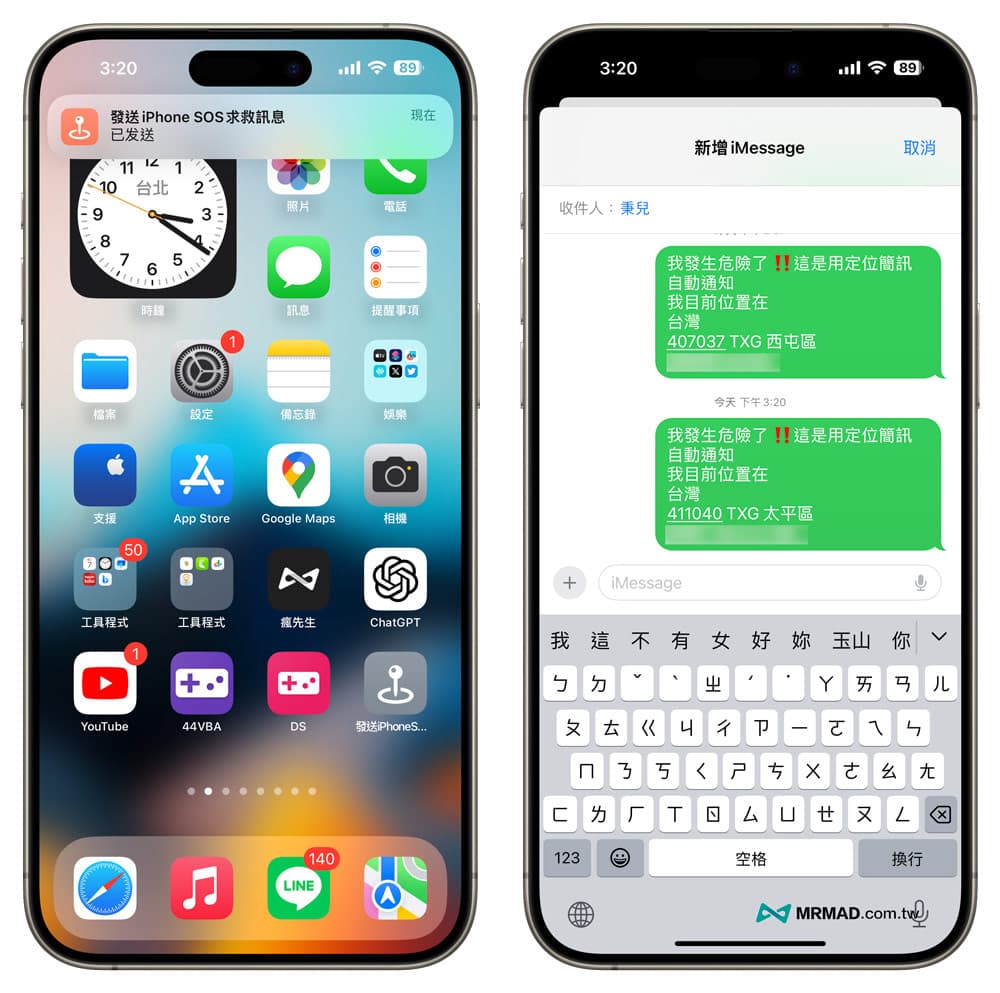
Create a one-click shortcut function to trigger SOS text messages on iPhone
If you find that touching the back of the phone three times will cause the iPhone to frequently touch the SOS shortcut by mistake, you can directly place the shortcut script on the desktop and change it to execute the help message with one click. Here is the setting method:
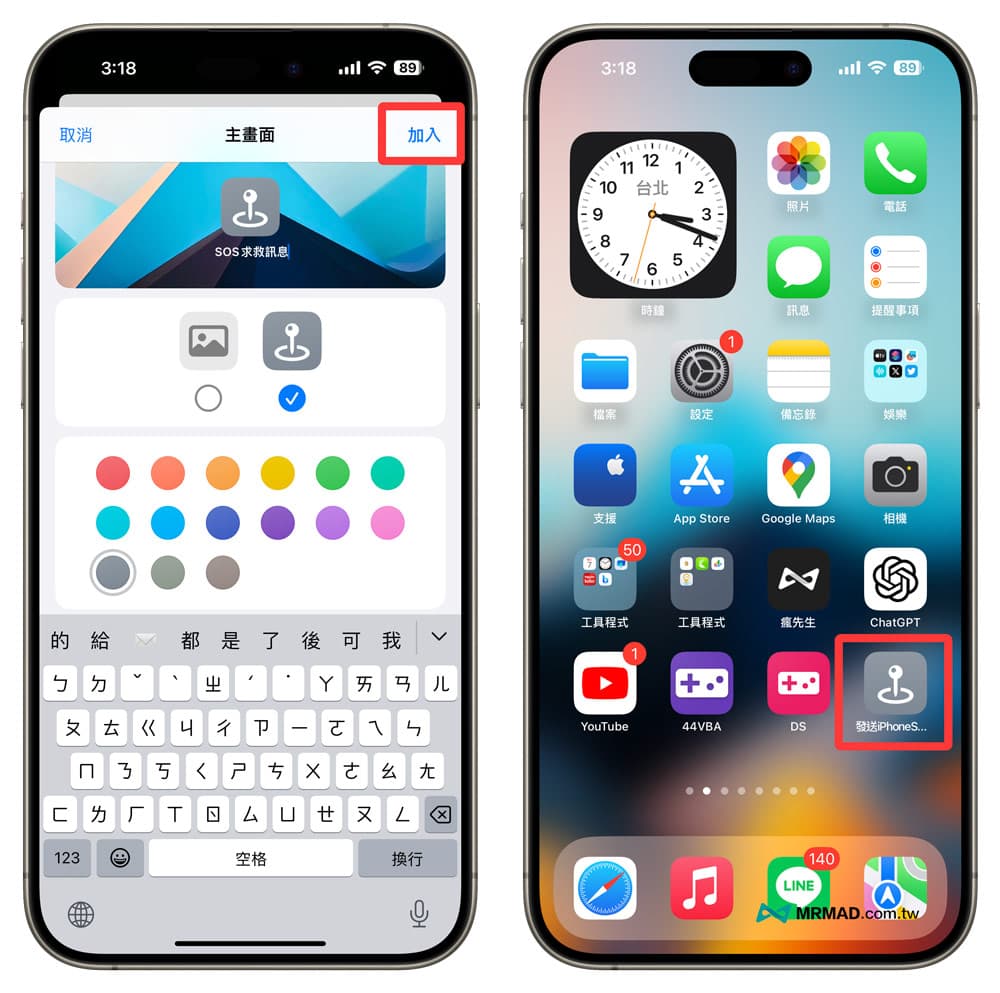
From the Shortcut App, long press “Send iPhone SOS message” and select “Share”, then click “Add to Home Screen”.
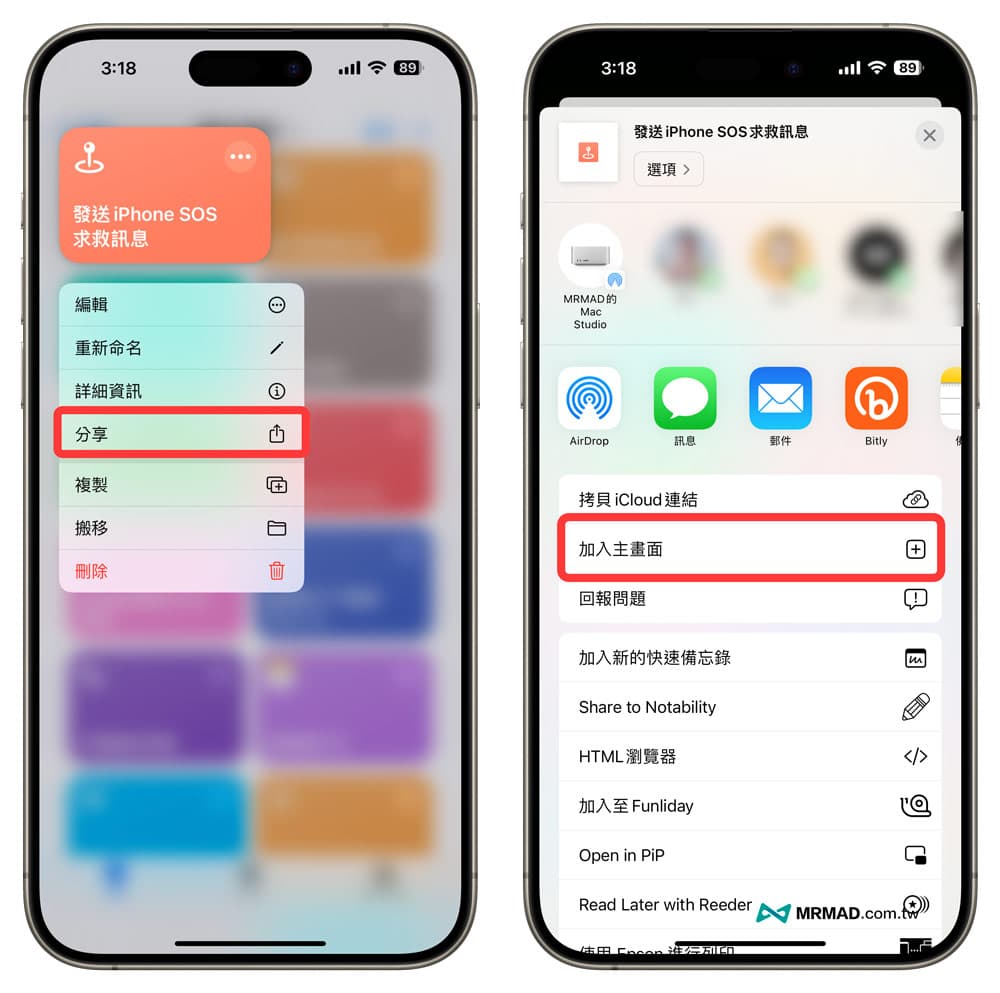
After directly clicking “Join” in the upper right corner, you can place the distress message shortcut script on the desktop. You can also click the same button to immediately send a distress text message to the emergency contact.
Function summary
Through the iPhone emergency SOS shortcut script shared in this article, you can send a help message with one click or three taps on the back of the phone, and can also send the current location. This function is suitable for women or friends who often walk home alone. Be sure to download and install it. It will be safer to set up more help functions in your mobile phone.
Of course, it is also recommended to set up the SOS emergency function built into the iPhone system. For detailed operations, please refer to the following related tips: