When an iPhone starts to experience abnormal power consumption, camera malfunction, or screen touch is weird, or you suspect that the phone has been repaired or there is a problem with parts, most people’s first reaction is usually to restart the phone, update iOS, or even send it directly for repair. But in fact, many people don’t know that Apple does have an official iPhone diagnostic process tool. This article will teach you how to enable Apple’s official iPhone diagnostic mode, which situations are suitable for use, and what restrictions you need to know first. If you happen to encounter iPhone repairs, parts replacement, or want to confirm the device hardware status, you must read this article.
What is iPhone diagnostic mode?
The iPhone diagnostic mode is Apple’s official hardware test suite open to general users in conjunction with the “Self Service Repair” program. This system is exactly the same as the detection logic used by direct-sales store engineers and can deeply scan the core hardware components of the device.
As for the iPhone diagnostic mode, it can detect a very wide range, including but not limited to:
- Display and touch abnormalities: Check the screen for dead pixels and touch faults.
- Camera and sensor module: Test whether the main camera, ultra-wide-angle lens, and Face ID depth-sensing camera are functioning properly.
- Audio system: Test the reception and playback of the earpiece, bottom speaker and microphone.
To put it simply, if you find that the touch control of your iPhone suddenly fails, Face ID cannot be recognized, or you have just bought a second-hand iPhone but are worried about invisible hidden damage inside the machine? There is no need to spend time making an appointment to go to an Apple Store or authorized center. You can use the iPhone diagnostic mode at home to check whether the hardware is faulty.
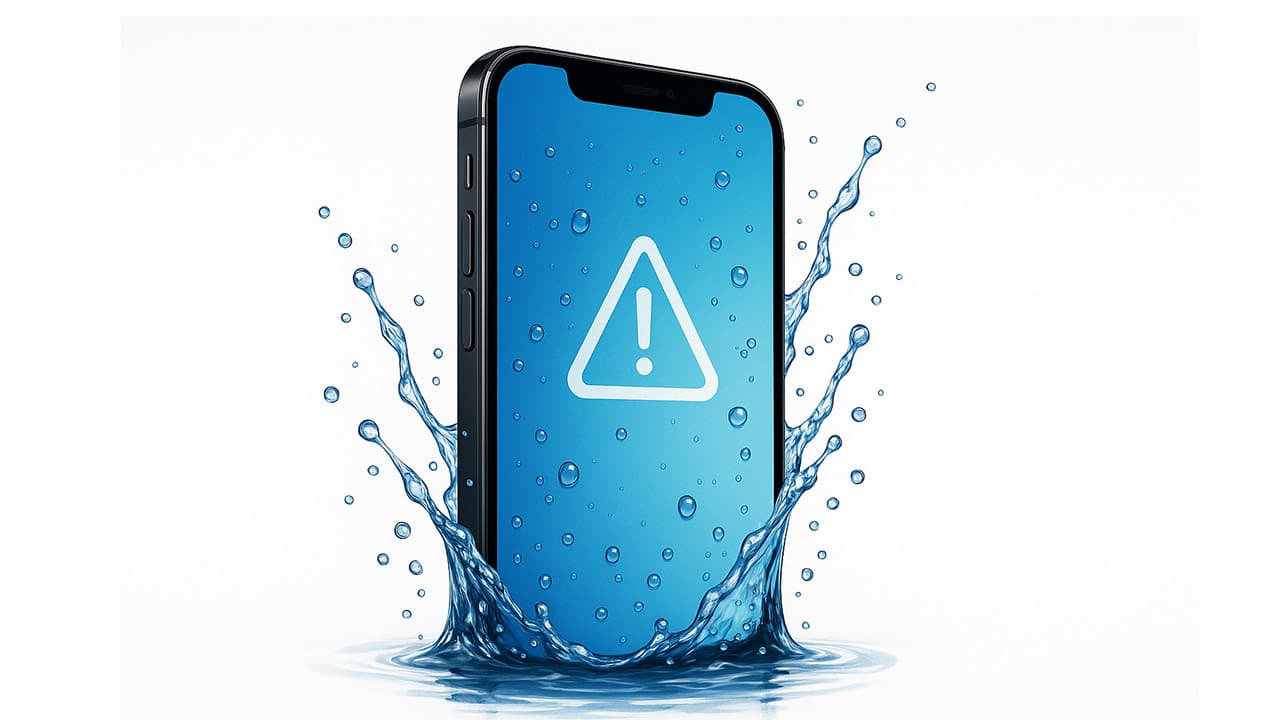
Preparation for entering iPhone diagnostic mode
Before you start, this original factory detection function relies on cloud verification, so you must first prepare the following conditions:
- Charging cable: You need to prepare the iPhone charging cable and charger. You need to charge it to enter the diagnostic mode.
- System version requirements: It is recommended that the tested device be upgraded to iOS 26 or above to ensure support for the latest official self-service diagnostic web page mechanism.
- WiFi network: The iPhone under test needs to be connected to Wi-Fi to exchange diagnostic data with Apple servers, and cannot use the mobile network.
How to use iPhone diagnostic mode? Apple’s official hidden enablement method
If you want to enter Apple’s official diagnostic mode for your iPhone, you can follow the process below (this article was tested in the iOS 26 environment):
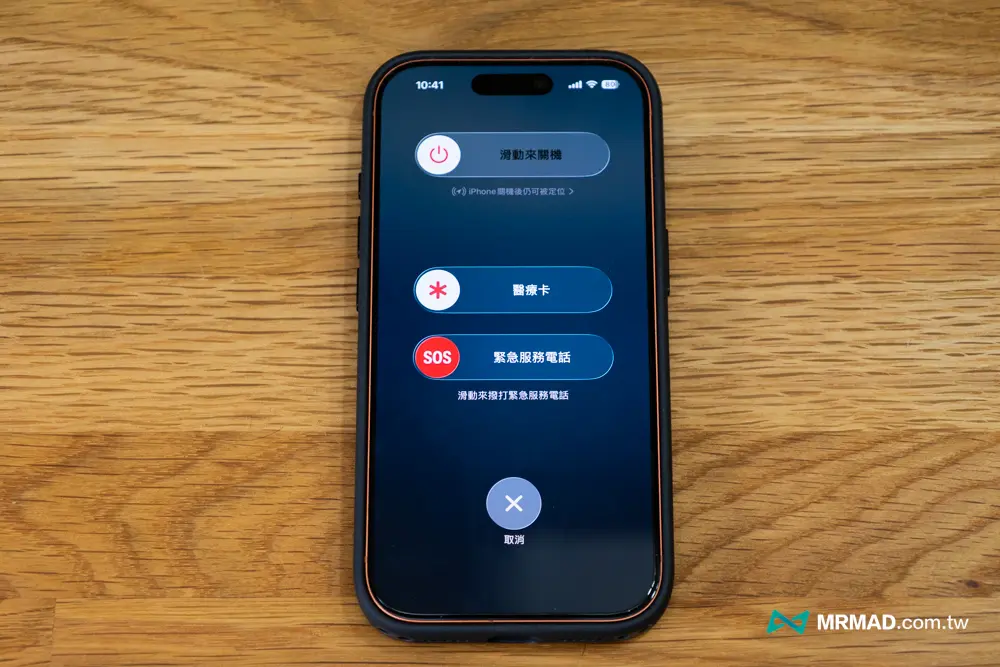
Step 1: Turn off the iPhone being detected first
Press and hold any volume button on the iPhone plus the side button until the power off slider appears, or go to iOS “Settings” > “General”, slide to the bottom and click “Shut Down”, and slide the power icon to completely shut down the device. Wait about 30 seconds after shutting down to allow the device to completely shut down.
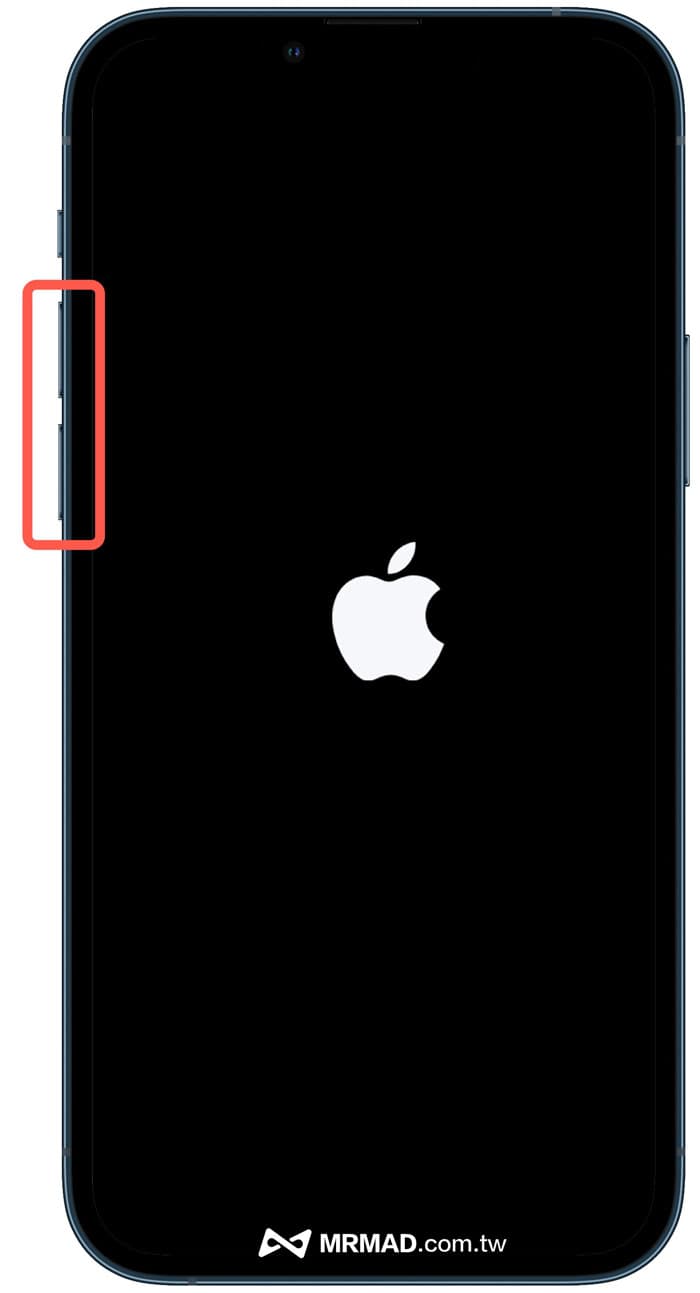
Step 2: Press and hold the volume up and volume down keys at the same time
To press and hold the two volume buttons on the side of the iPhone at the same time, you cannot press only one of them.
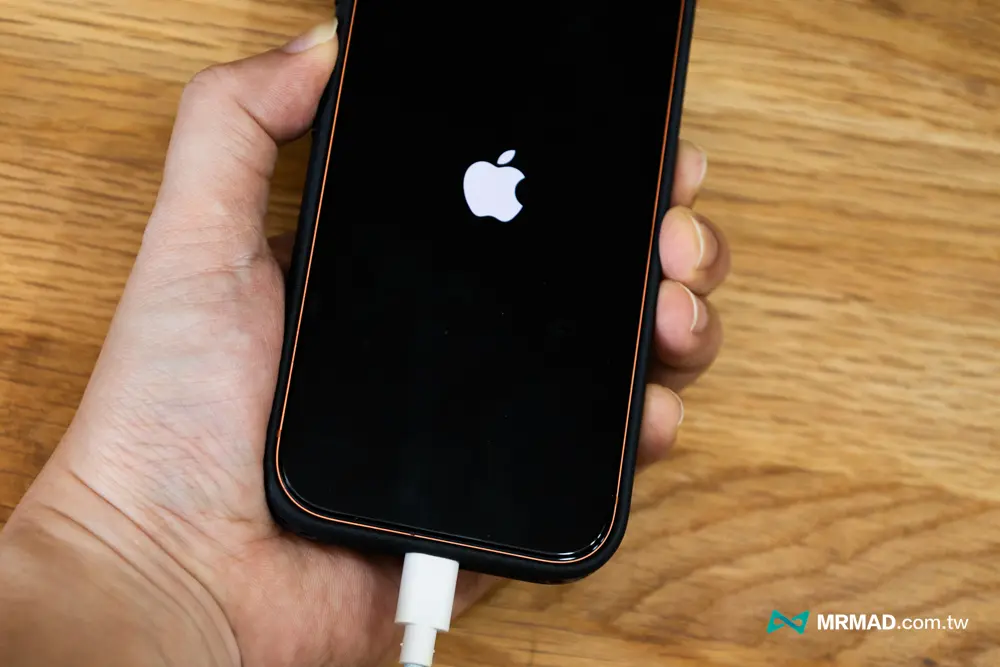
Step 3: Plug in the power and release when you see the Apple logo
Next, connect the iPhone to a power source through a transmission cable, which requires an 18W or higher charger, a power bank, or a computer. Keep pressing the button until the screen lights up and the Apple logo appears, wait three seconds, and then release the volume button.
Step 4: Modify Diagnostic Mode Chinese Culture
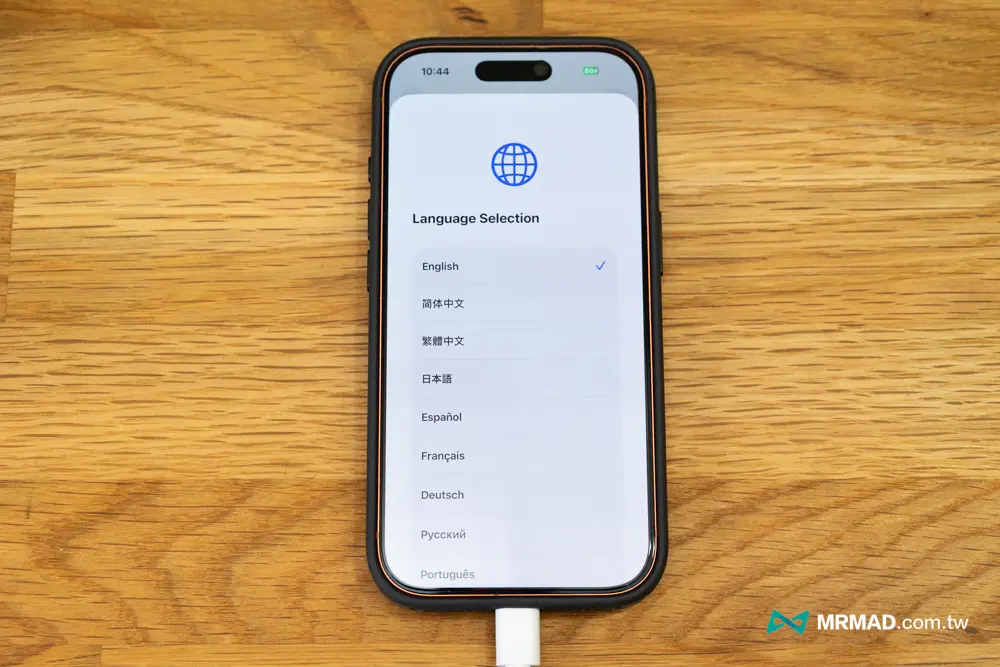
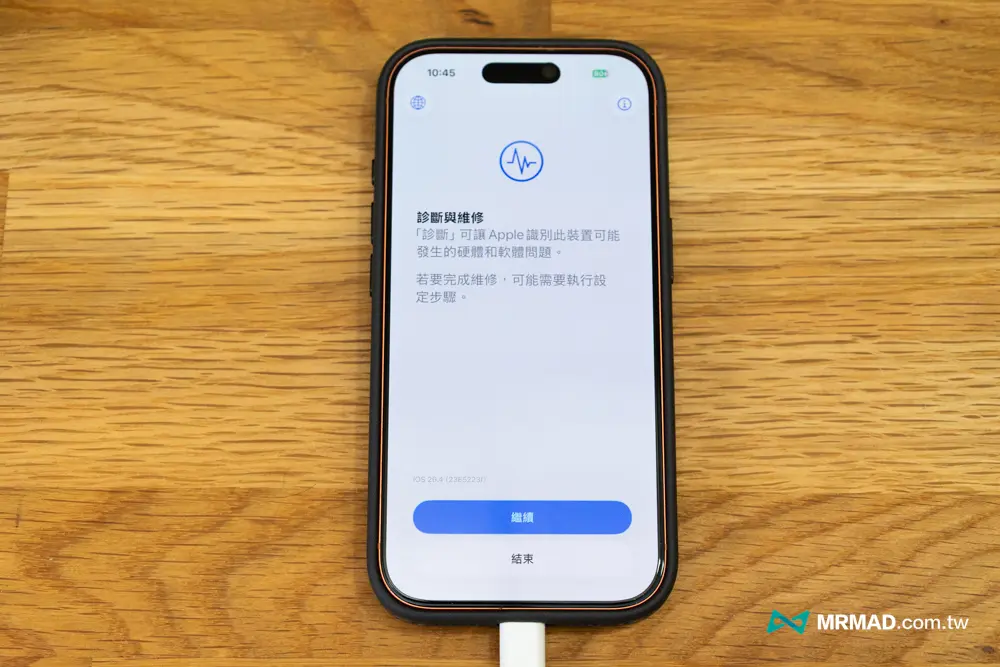
Then the iPhone screen will jump out of the diagnostic mode (Diagnostics & Repair) and display the message “Diagnostics allow Apple to identify potential hardware and software issues with this device”. First click the “Globe Key” in the upper left corner.
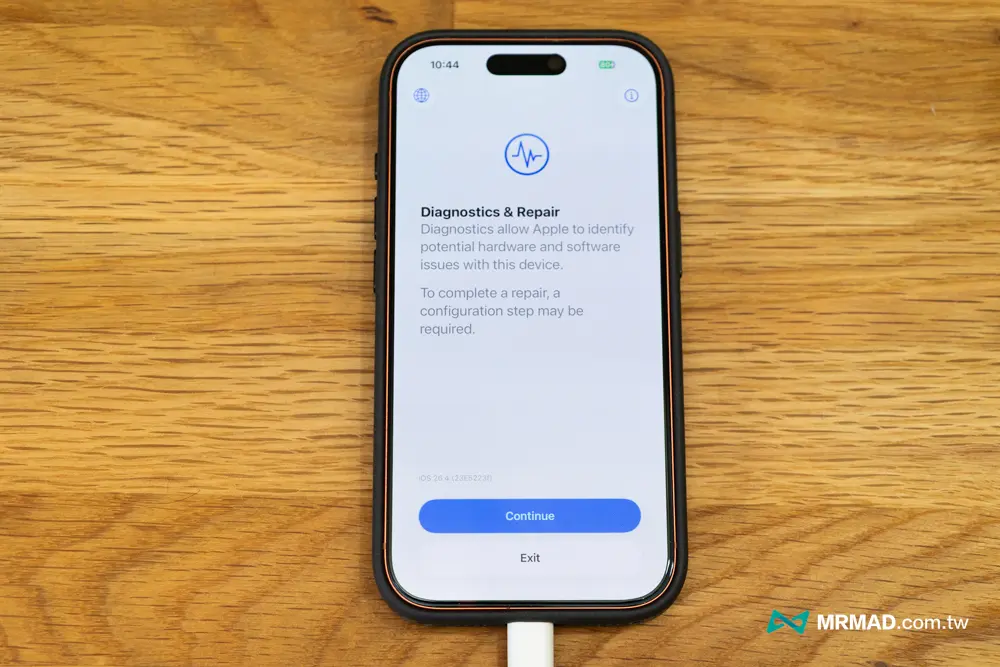
After selecting “Traditional Chinese”, you can change the diagnosis and maintenance mode to the Chinese language system.
Next, click “Continue” to start the iPhone self-diagnostic test.
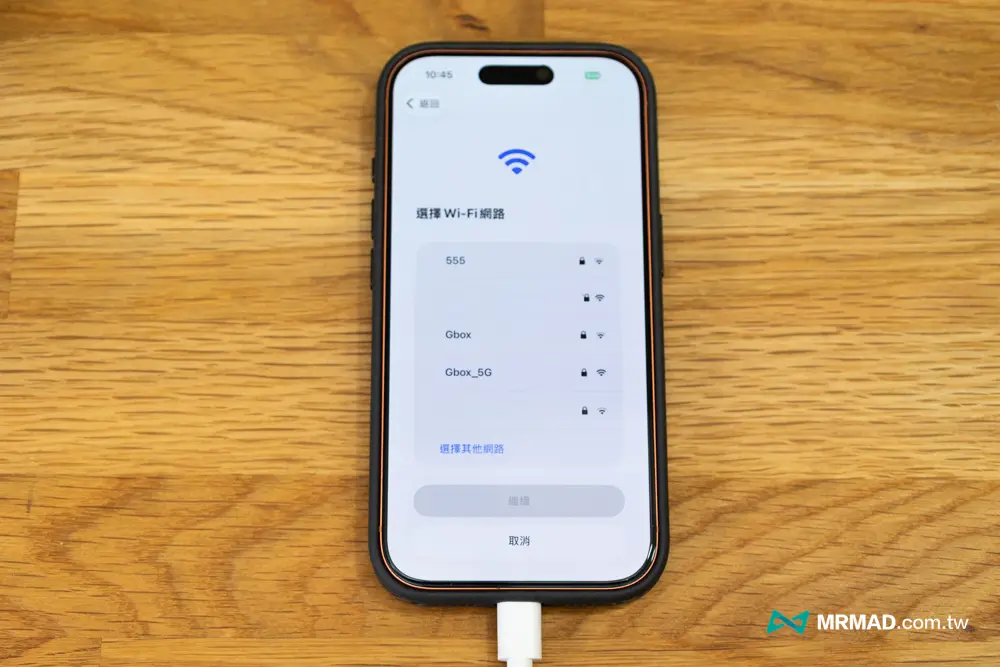
Step 5: Connect to Wi-Fi network
The system will then ask you to select and connect to the Wi-Fi network at home. After the connection is successful, the iPhone will stay on the screen waiting for the diagnostic connection.
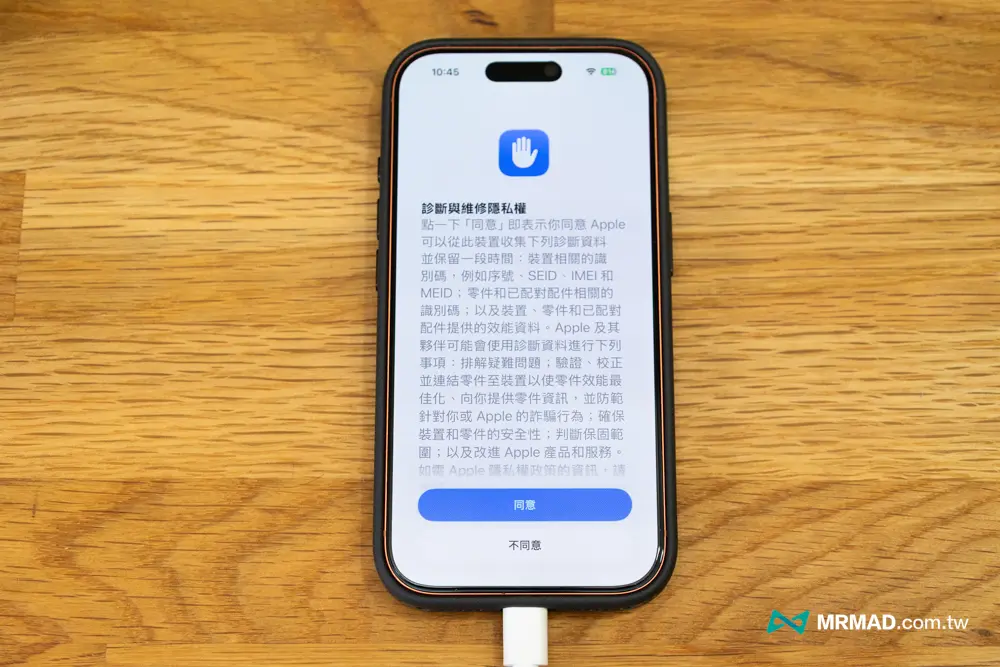
Step 6: Detect iPhone hardware status
After clicking Start, the prompt “Agree to Diagnosis” will pop up on the screen of your iPhone under test. Click Agree to continue.
Then click “Perform Diagnosis” to start enabling the iPhone detection function.
Some iPhone devices will get stuck on the Contacting Apple support status page. Current tests have found that some models may not be supported, and may not be included in the self-service repair plan list.
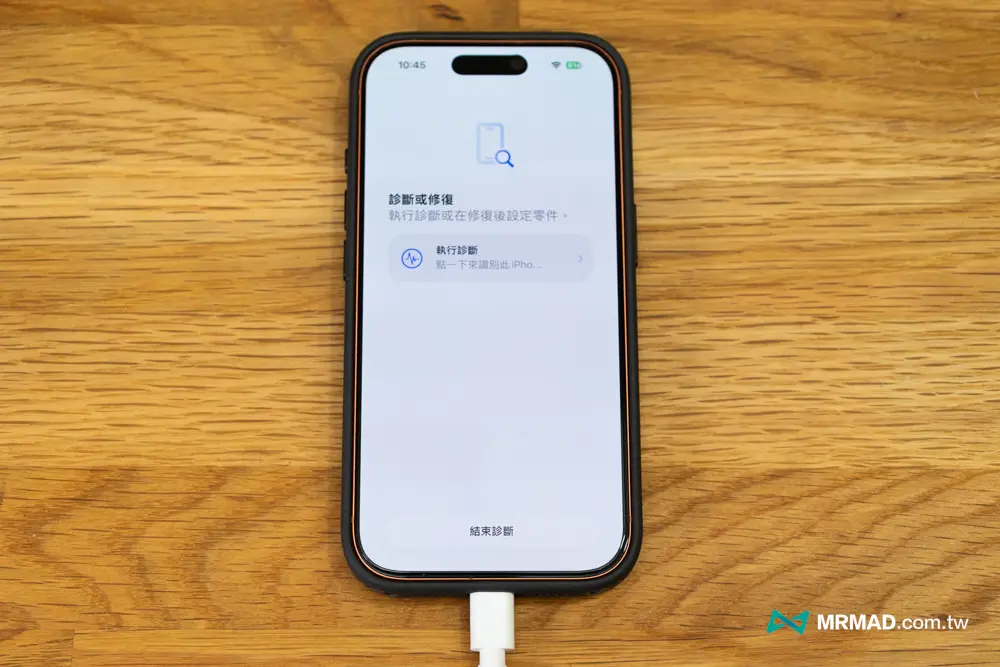
You can select the iPhone hardware item you want to test (for example: camera, audio or display), and the system will automatically run the original factory-level testing process on the iPhone under test!
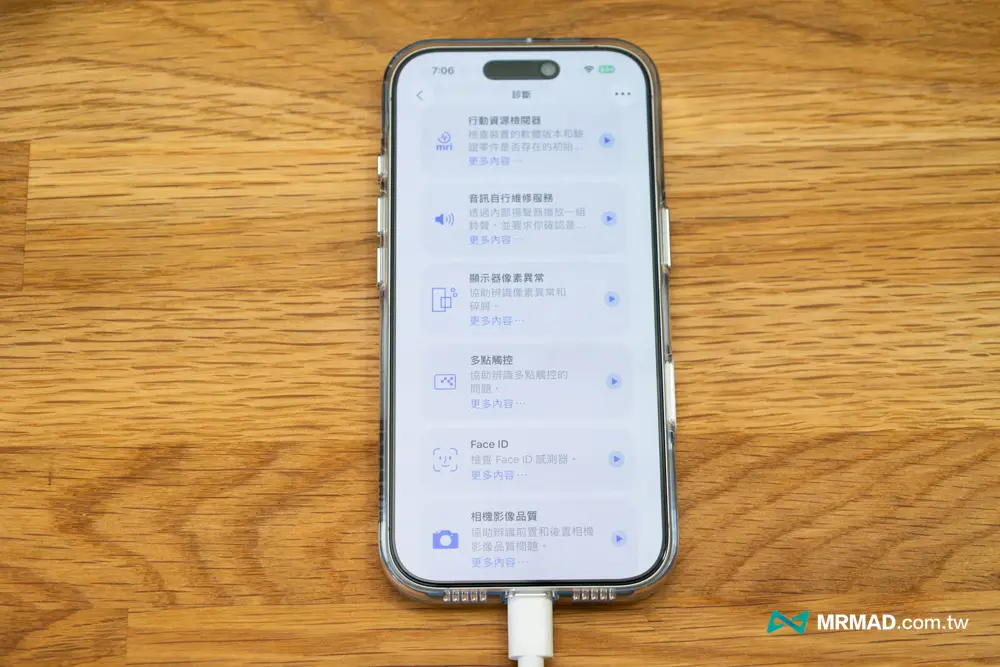
Step 7: Detect using Mobile Resource Inspector
It is usually recommended to directly select the “Mobile Resource Reviewer” to test all software and hardware of the iPhone and find the problem immediately.
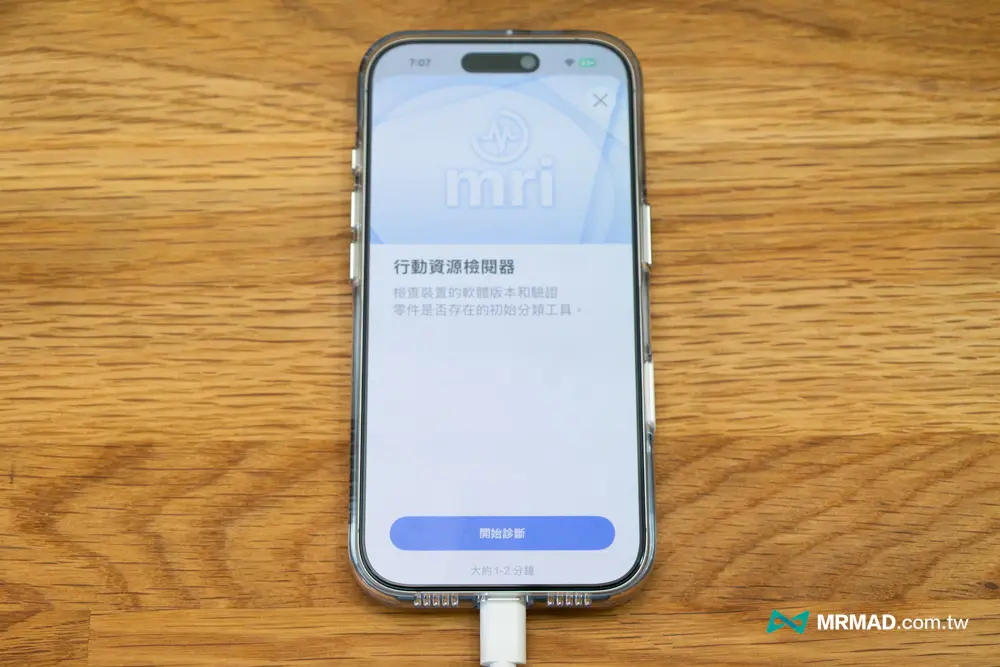
The detection process will take 1-2 minutes, and the system will conduct a full iPhone inspection.
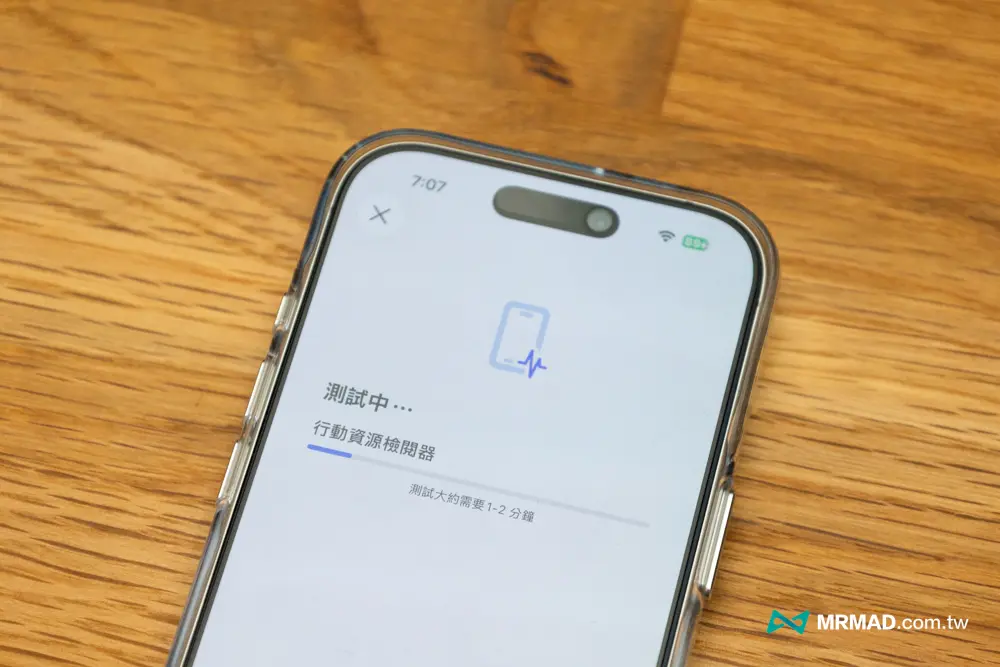
Step 8: Query device test results
After the test is completed, detailed iPhone software and hardware test results will be listed. Usually, if there is no problem, a green check will be displayed. If there is a problem, a yellow warning icon will pop up.
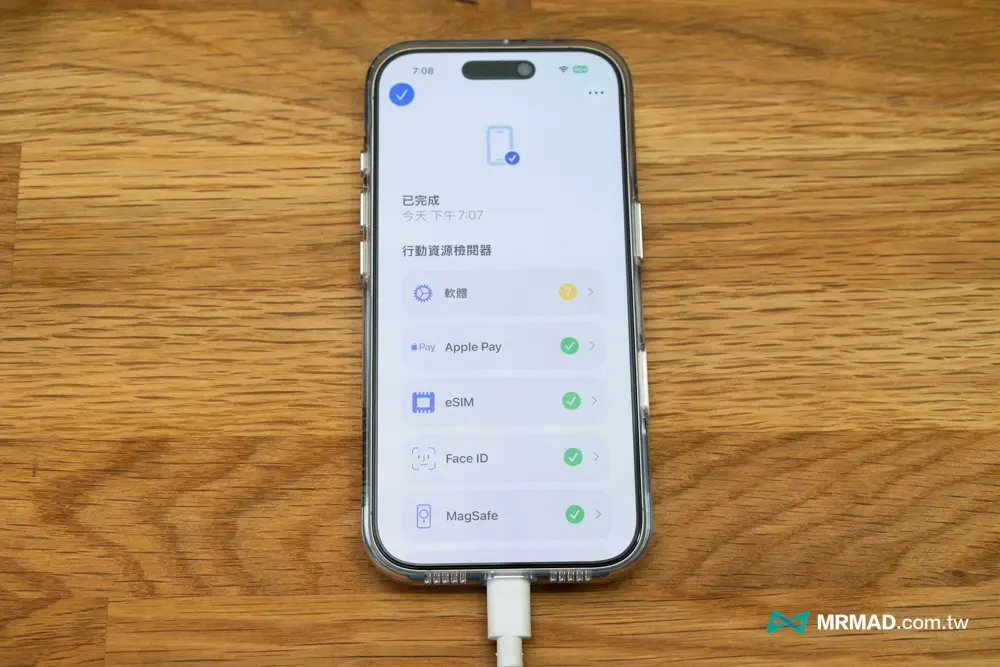
The official built-in detection function is actually very comprehensive. It will detect iPhone hardware including battery, display, Face ID, eSIM, MagSafe, lens, wireless charging, Bluetooth, and mobile network RF/baseband.
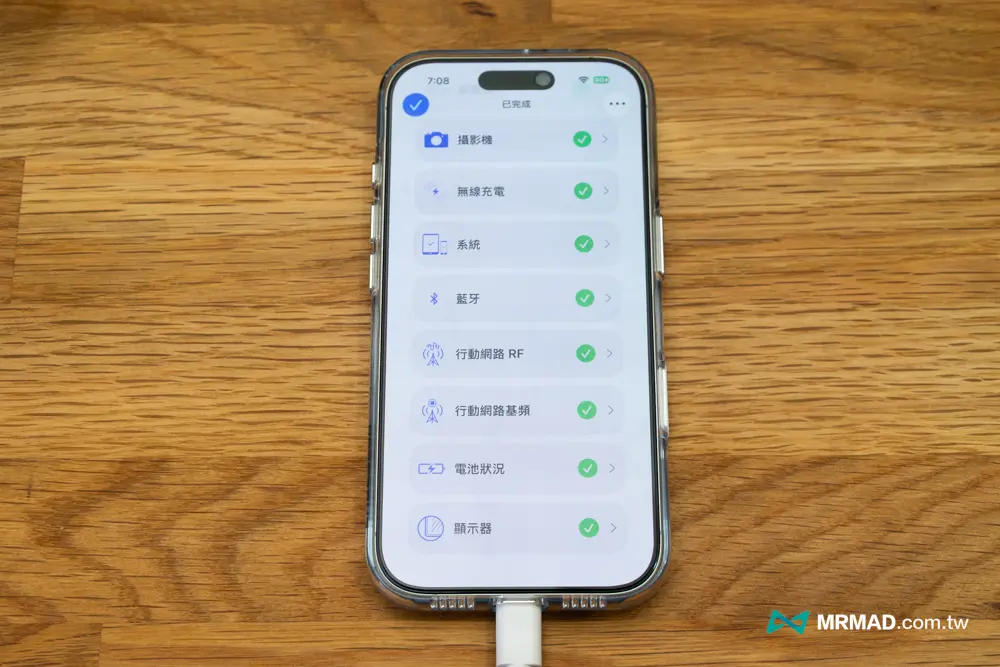
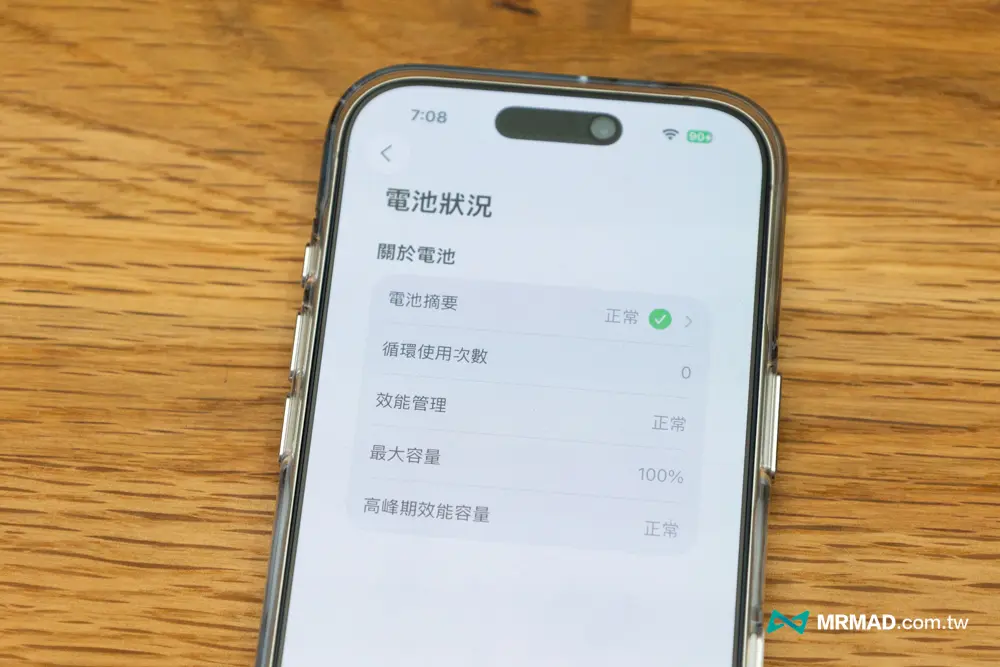
For example, many people suspect that their iPhone consumes a lot of power. You can also check whether the battery is aging through the diagnostic mode. If a warning appears, replace the battery!
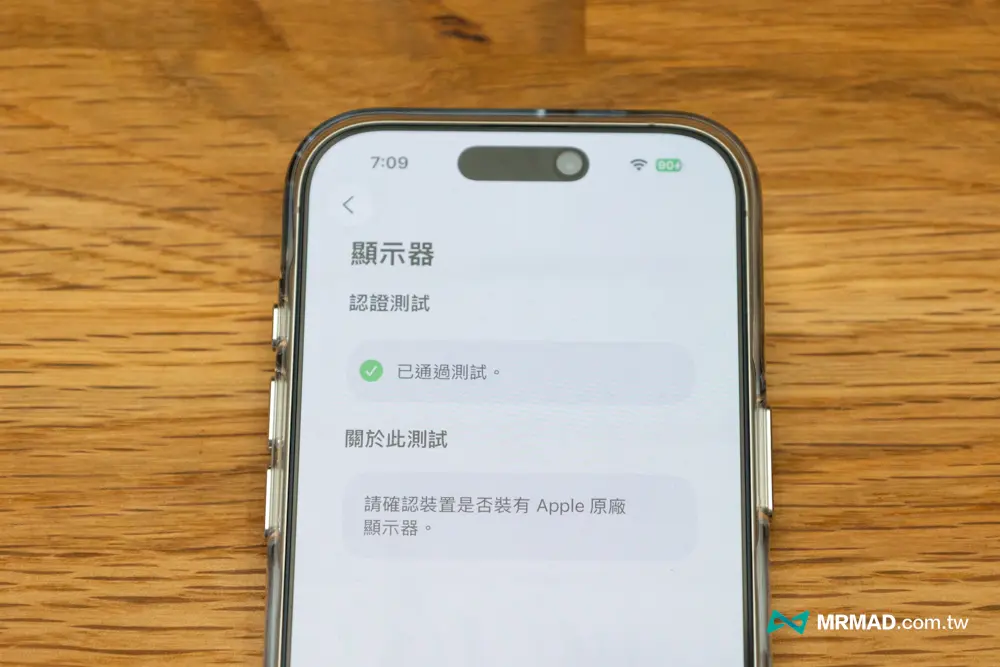
For example, after repairing the screen or other parts, you can also run the iPhone diagnostic mode test yourself to determine whether the parts you just replaced are original parts.
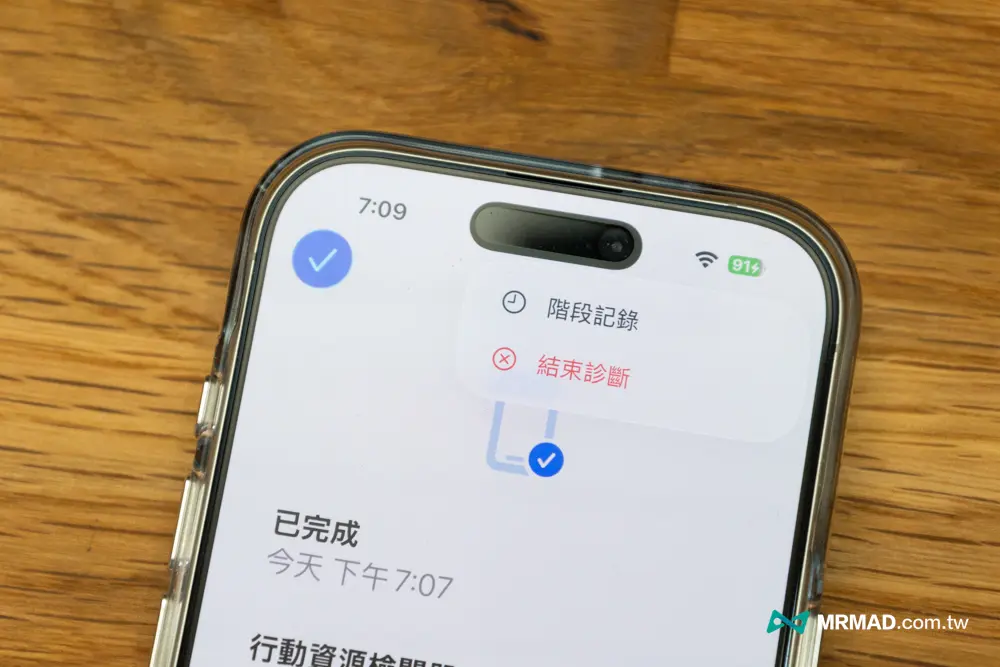
Step 9: Exit detection mode
After final confirmation, you can click the “three dots” in the upper right corner and select “End Diagnosis” to automatically restart the iPhone back to normal iOS mode.
What does iPhone diagnostic mode check?
Apple does not publicly list which hardware items and error codes the iPhone diagnostic mode can detect one by one like Apple Diagnostics for Mac. However, judging from the function menu, this mode is positioned to allow Apple to identify potential hardware and software problems, and is often used in conjunction with system configuration, calibration and parts confirmation after repair.
Judging from actual usage logic, if you encounter the following project anomalies, it is usually suitable to use the official testing process for further confirmation:
- The display has abnormal touch control and weird brightness performance
- Abnormal display or abnormal power consumption after battery replacement
- The front lens, rear lens, and Face ID module function abnormally
- After repair, the system keeps showing parts prompts
- It is suspected that the device has been replaced with non-original or second-hand parts

What should I do if my iPhone cannot enter diagnostic mode?
If you still can’t get in after following the steps, there are a few things you can check first:
- To confirm whether it is really shut down completely, then press and hold both volume buttons at the same time.
- Make sure the connected power supply or computer has normal power supply. Apple officially recommends a power supply of 18W or above.
- If your purpose is to complete the correction after repair, you should actually first check whether there is a Finish Repair or corresponding prompt in the “Parts and Repair Records”, because that may mean that what you need is not to simply enter the diagnostic mode, but to complete the Repair Assistant process.
If that still doesn’t work, the safest option is to contact Apple Support or an Apple Authorized Repair Center directly. Apple officials have also made it clear that Apple authorized repair center technicians use Apple original parts, tools, diagnostics and resources.
Summary iPhone diagnostic mode is the official entrance to repair and testing
If you originally thought that the iPhone diagnostic mode is like a Mac, a hardware testing tool that everyone can open at any time, then you should be able to understand the difference this time.
The iPhone’s official diagnostic mode is more focused on maintenance scenarios, system configuration, and fault identification. It is not a function for daily checking the status of the phone. What is really most helpful to ordinary users is to first check the parts and repair records. If there are replacement parts, then confirm whether correction needs to be completed through Repair Assistant.
If you want to know more Apple information, iPhone teaching and 3C information skills, please follow us
Crazy Mr. FB fan group,
Subscribe to Mr. Crazy Google News,
Telegram,
Instagramas well as
Subscribe to Mr. Crazy YouTube.