Do you also find the “kneading and squashing” special effects video that has gone viral on social media recently interesting and magical? Do you want to make the same video yourself? In fact, it can be easily done through the AI special effects website Pika art. This article will teach you how to use Pika teaching techniques. In just 3 steps, you can generate short videos of special effects such as kneading, squashing, explosion and expansion.
Pika art is an online AI tool that can convert static pictures into dynamic videos and apply various interesting special effects, such as kneading, squashing, exploding, floating, cutting in half, melting, etc. Moreover, the threshold for getting started with Pika art is extremely low. Even if you don’t understand the grammatical instructions, you can still get started quickly.
For example, you can use the Pika art website to directly create a visual effect of crushing with both hands. You can crush the characters in the photo like clay. It is super magical and has a very funny and healing feeling.
The #Meme Revolution is here. 👀🤩
Check it out guys. 😎Try effects here – https://t.co/078Z3QULMr pic.twitter.com/jkGOX9DCSL
— Noro (@Norro_Web3) October 30, 2024
Pika art tutorial: four steps to create your viral video
1. Log in to register a free membership account
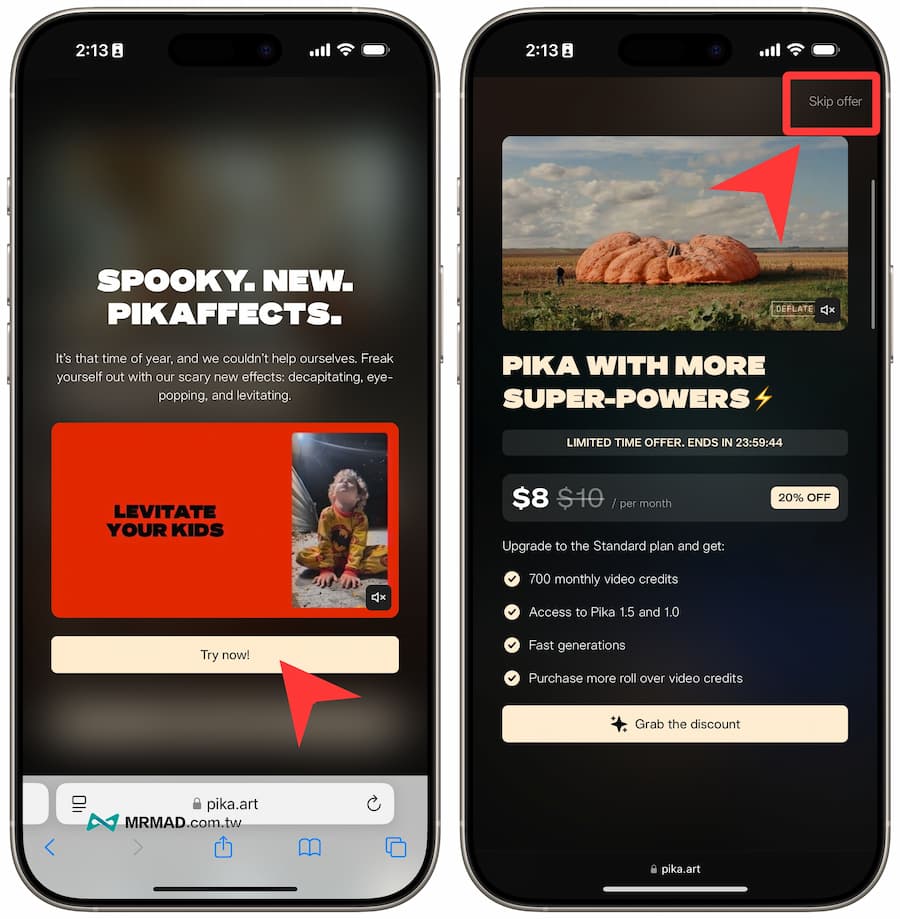
First log in directly through your mobile phone “Pika official website“, click “Sign in” in the upper right corner to register as a member first, and quickly register and log in directly through Google, Facebook or Discord.

After successfully logging in as a member, just click “Try now!” to start. The next page will display a prompt to upgrade to the paid version. Just click “Skip offer” in the upper right corner to skip directly. Even with a free account, you can also use Pika art to create many AIs. Special effects video.
2. Upload the photo materials to be synthesized
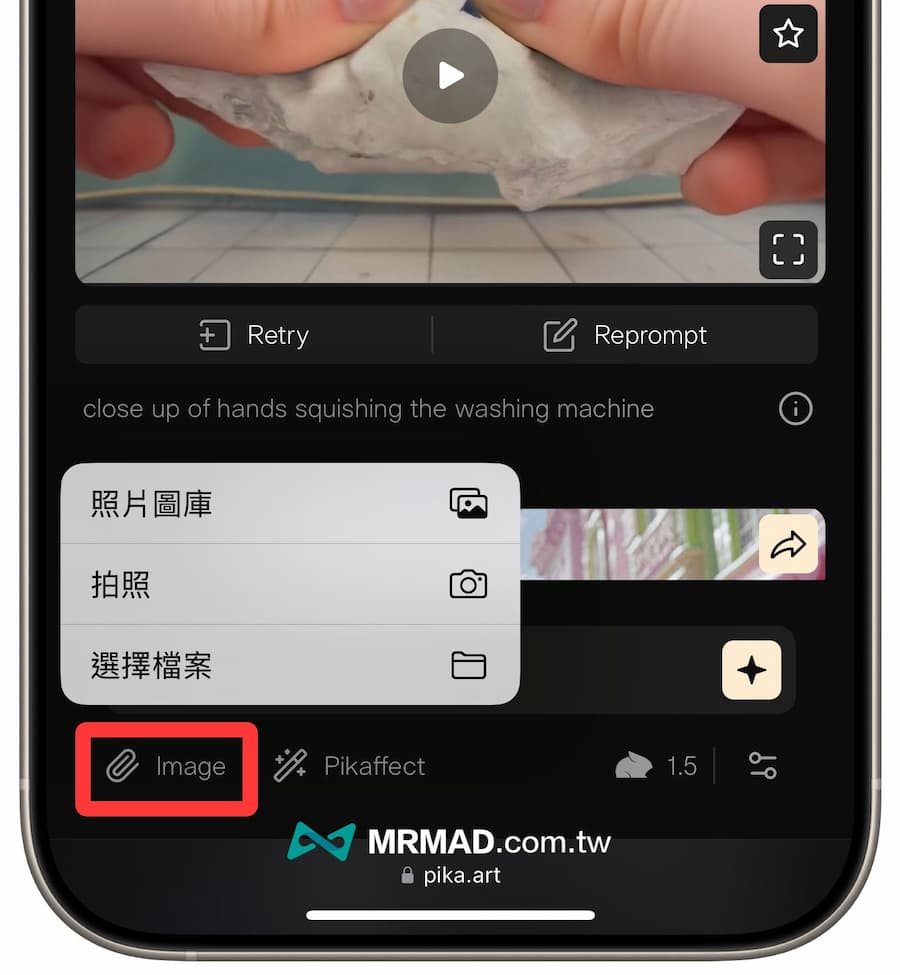
Next, to upload the photos to be combined, select the “Image” button in the lower left corner of the Pika art main screen. You can upload photos through the photo gallery or taking photos. It is recommended that the photos be single portraits and not too cluttered or have too many people.
3. Select short film effects
Then click “Pikaffect” on the right to select the short film special effect you want to apply. You can refer to the comparison table below. For example, you can choose the very red “Sqish it” special effect. Finally, click the “Shining ✦” icon and the process will begin. AI synthesis operation.
- Ta-da it (magic)
- Deflate it
- Crumble it
- Dissolve it
- Squish it
- Inflate it
- Melt it
- Crush it
- Cake-ify it (cake cutting)
- Explode it
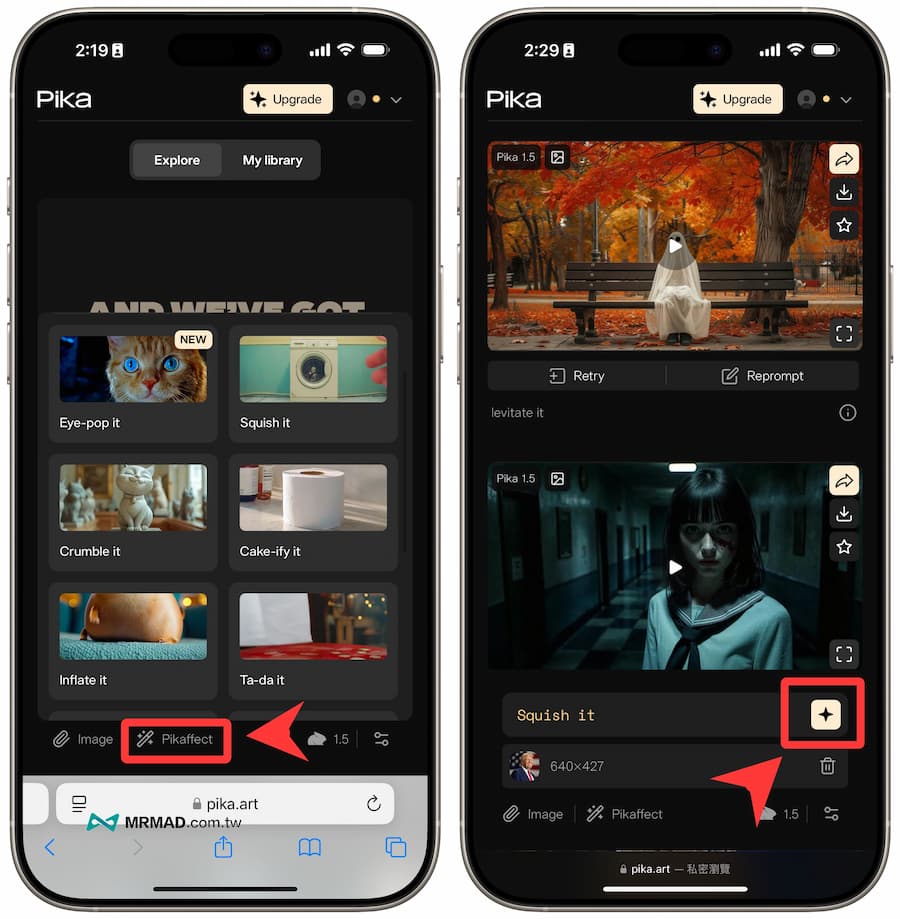
4. Wait for the AI video calculation to complete
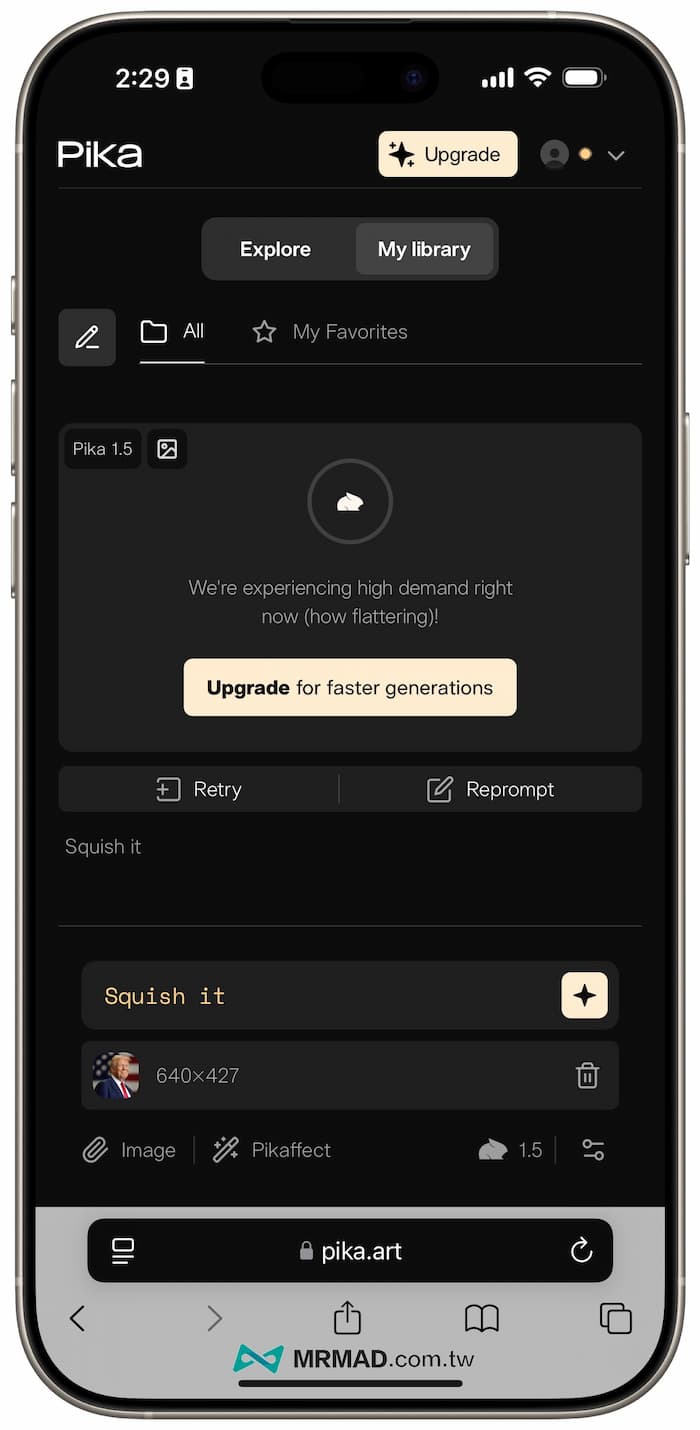
When starting AI synthesis, you will always see the upgrade paid professional version screen. Remember to click “Skip offer” in the upper right corner to skip directly. Enter the My library database screen. You will see the short video conversion prompt. Since many people are using it, you need to Take a moment to wait for the video synthesis to be completed before finally browsing and downloading the special effects clip.
Pika officially provides 150 credits initially. Each time you generate a video, 15 credits will be consumed. A free account can generate up to 10 credits.
Pika special effects display
In fact, most of Pika’s special effects are spoof effects. In addition to being able to be pinched, you can also choose special effects such as crushing, exploding, cutting, and swelling to float. If you want to turn your photos into eye-catching short videos or limited motion in seconds!
🩵💀 Don Ramón Chikito x PikaArt 💀🩵
Mafufada hecha por https://t.co/7WYR7XXO8W para no tener muerta la pagina de Don Ramón Chikito Posting XD pic.twitter.com/oV8jrtf0b0
— randyproject 19 ✨ (@randyproject19) October 14, 2024
Does Pika art cost money?
Most of the functions of Pika art are free to use. For example, if you want to create simple kneading and flattening special effects videos, you can generate them for free, but there are also paid plans. The detailed differences are as follows:
Free plan:
- Basic special effects can be used, such as kneading, squashing, explosion, etc.
- There is a fixed free quota every day, and a certain number of videos can be produced.
- The function is relatively simple, but the conversion is slow and requires queuing.
Paid plan:
- Provide more diverse special effects and functions.
- 700 videos can be generated every month.
- Ability to remove watermarks.
- Accelerate shifting speed.
Pika art function conclusion
Pika art provides a simple and interesting way, allowing us to easily turn photos into creative and funny videos in seconds through AI. If you just want to play around and check out the free plan, you don’t need to worry about paying to use it. .
Further reading: